Creating GIFs can be a tricky task. But if you follow the right instructions, save your file in an appropriate manner, and plan everything in advance, you will succeed in making GIFs.
Here is a step-wise small guide on how to make animated infographics or GIFs, originally written and illustrated by Eleanor Lutz.
Part 1
The Bouncing Heart
To start with, let’s make a simple heart animation. Since a short GIF is always good, and uses limited colors. Your GIF might turn out to be grainy if you use too many colors. So it is better to create a bouncing heart animation using only three colors – red, white, and blue.
- Create a new PS file, and three separate layers, one with a heart, one consisting a shadow and third with a floor area
- Now, to create a bouncing effect, start duplicating the layer with hearts until you get eleven frames of hearts
- Do the same with the shadow, but increase it width-wise in each frame
- Make sure you are keeping all the equivalent frames in view, like shadow#3, heart#3
- The shadow should not move when the heart touches the ground, so, 10 frames will be just perfect instead of 11
- The animation frame is ready now, and it is time to apply animation
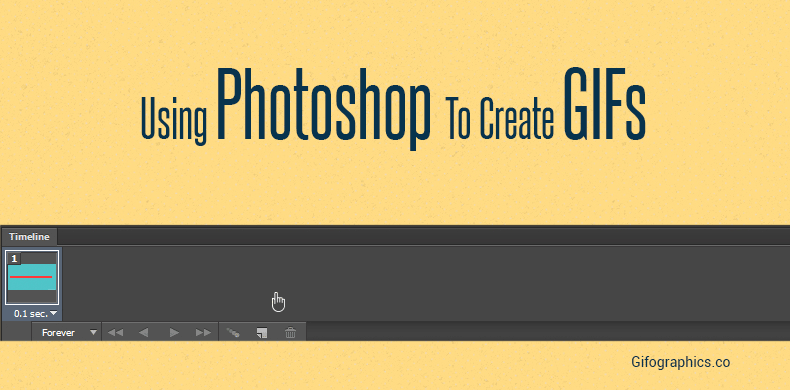
- Go to Windows, select “Timeline” and a grey rectangular bar will pop up at the bottom of the screen
- Now choose “Frame Animation” to control all 21 frames independently
- Although “Frame Animation” is used to change the position, visibility and layer style in each frame, you just need to change the visibility here
- Show and hide layers in a way that Heart#1 and Shadow#1 are visible together in first frame and Heart#2 and Shadow#2 are visible in second frame
- First frame will be automatically created but the rest need to be done by you
- You can use “Duplicate Frame Tool” to create 21 copies of the first frame and then go through each frame to ensure the right layers are visible
- To check the output, click on the play button, or choose “Once” to “Forever” to avoid hitting play button again and again
- Adjust the timing at which you want your GIF to be moving
- You can do this by selecting all the frames and then choosing the “Option” – “Other from Frame Delay Pop-Up” and type in the time

Tips For Troubleshooting Frame Animations
Adding New Layers
- For fine tuning your animation, choose “New Layers Visible in all Frames” from the “Timeline Toolbar” drop down menu.
- By default the toggle is on which means all the layers will be shown up in all frames
- You can toggle it off if you want only the new layers to be visible in the frame you are working on
Fixing Positioning Mistakes
- While you are working with so many layers, you might put them in wrong frames, so you need to fix this
- To do this, select the same layer, and in a fresh frame and click “Match Layer Across Frames”
Saving The Animation
Saving a file is usually the easiest thing, but not in the case of a GIF. First you need to go to “File Menu” and select, “Save for Web.” There are five major options to save your GIF. they are:
- Color – A GIF can accommodate 256 colors. But to keep the file smaller, it is better to use limited colors. So opt for 32 or 64 option
- Dither – When pixels of existing colors are placed strategically to give an impression of a third color, that is called dithering. The higher it is, the smaller your GIF will appear. Use between 75%-98%
- Image Size – To save space in your system, save the file in small size
- Looping – For seamless looping, select from this dropdown menu of Looping. Adjust the playback controls to see if it is perfect
- File Size – Ensure your GIF size is less than 1 MB and 2.5 MB in case if the size is bigger
Part 2
The next GIF is a little bit more complicated. It will include different moving parts of a human to create a GIF. Start by creating the ten separate body parts, and repeat step 1 to create a moving image just like you did with heart.
4 Ways To Organize A Photoshop File With Multiple Animated Parts
- Loop Count – For straightforward animations, using “Loop Count” is a great idea to ensure that every frame in the loop is numbered in a sequence
- Frame Count – To avoid pausing of the animations, labeling each layer with frame number is a good thing
- Groups – When you need two different layers for one object in one frame, then you need 2 different color overlays for each frame
- Static Layer – If everything is a GIF then your file will be too heavy. What you can do is reduce the amount of area which changes every frame to lower the file size.

How To Plan The Layout Of A Complex Animation
When you are planning to make scientific themed GIFs, it is better if you plan everything in advance – from movements to components. You can make sketches of all the sections, and this will make your task easy. Interactive animations are confusing enough, so you need to have a planning in place.
Thank you for the sensible critique. Me & my neighbor were just preparing to do a little research on this. We got a grab a book from our area library but I think I learned more from this post. I am very glad to see such excellent information being shared freely out there.
I really like your writing style, excellent info, thank you for posting :D. “In university they don’t tell you that the greater part of the law is learning to tolerate fools.” by Doris Lessing.
I like this post, enjoyed this one thanks for posting. “No trumpets sound when the important decisions of our life are made. Destiny is made known silently.” by Agnes de Mille.
I genuinely enjoy examining on this website, it has got wonderful blog posts. “And all the winds go sighing, For sweet things dying.” by Christina Georgina Rossetti.
Thank you Shane for sharing! Great tutorial!
I simply want to say I am just new to blogging and definitely loved your web page. Very likely I’m want to bookmark your blog . You amazingly come with excellent writings. Many thanks for sharing your web-site.
very good post, i surely really like this excellent website, persist with it
I simply want to tell you that I am a beginner to blogging and actually savored your blog. Most likely I’m want to bookmark your website. You definitely have good posts. Many thanks for sharing your blog site.
I just want to tell you that I am a newbie to blogs and honestly loved your website. Likely I’m likely to bookmark your blog. You certainly come with beneficial posts. Regards to sharing with us your web page.
“Thanks for sharing, this is a fantastic blog article. Really thank you! Fantastic.”
I simply want to mention I am just beginner to weblog and definitely liked your web blog. Likely I’m likely to bookmark your blog. You absolutely come with incredible article content. Cheers for sharing your website.
I am just starting to learn about all of this. Thanks!
I simply want to mention I’m all new to weblog and definitely liked your website. More than likely I’m likely to bookmark your blog post. You actually come with outstanding article content. Thanks a lot for sharing your website.